I just launched a new minimalgoods design inspiration gallery showcasing the 1500+ items I’ve been curating on the minimalgoods Instagram since 2017.
Webflow also recently launched a pretty handy membership feature, allowing you to show or hide pages on your site depending on whether the user is logged in or not. This functionality is exactly what I needed to finally go live with my inspiration gallery, and I was excited to try it out.
Unfortunately, this feature was rushed out the door so Webflow could focus on other features, so some of the functionality you would expect isn’t yet available.
I wanted to make sure every new member on my site was added to my CRM (Mailerlite in my case), allowing me to send them a welcome email right after they sign up.
Here’s how I got it working. Keep in mind all of my examples use Mailerlite, but this should be the exact same process using Mailchimp as well.
The automation overview
I’m a make.com fanboy and use it for everything, but I imagine you could get the exact same result using Zapier. This is what it looks like from a bird’s eye view.
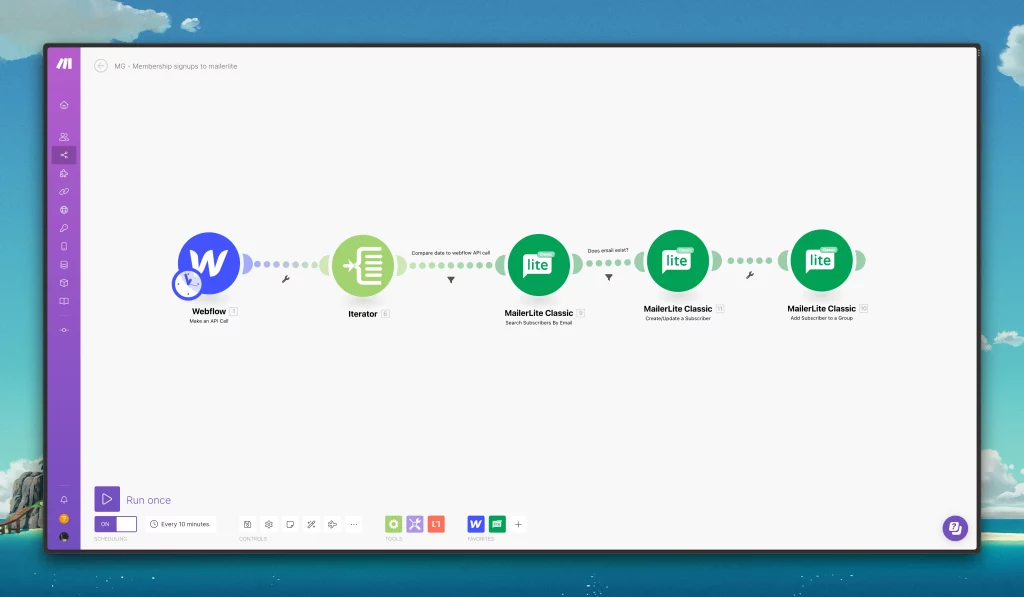
Step-by-step breakdown
Make a Webflow API call
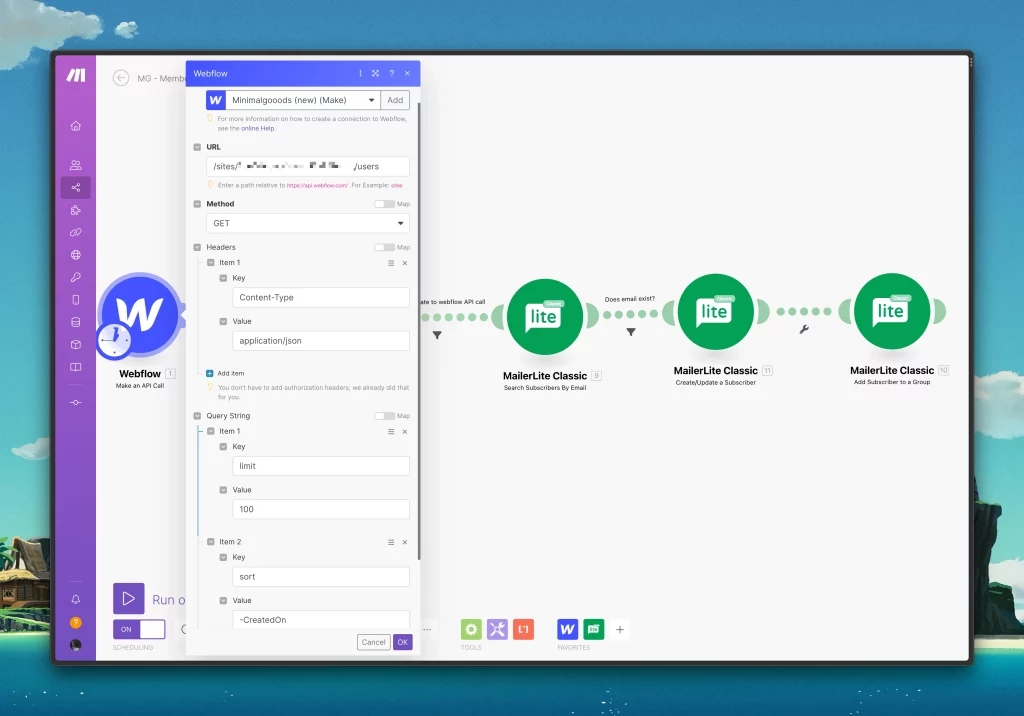
Since make.com doesn’t yet support the memberships API from Webflow, we’re going to have to jump in and do things the old-fashioned way.
First, create a connection to your site with the “Make an API call” module, and set the schedule to run every 10 minutes (adjust to your taste).
Next, we’re going to need to find the unique ID of our site. The simplest way to do this is to open the asset manager, and then open up any of your uploaded assets in a new tab. The URL structure should be something like this:
https://uploads-ssl.webflow.com/5csd98s07870a98sdfasdff/64799b2b96f75e19d39b529c_filename.webpYour site ID is that first mess of numbers, immediately following the first slash after webflow.com. Copy that number, type in /sites/ in the URL field on make.com, then paste in your site ID after it.
Next, we’ll just want to limit the number of users it returns and make sure it’s sorting them by date. Under “item 1” add “users” to the key field and “100” to the value field.
Run that module to get some sample data.
Iterate the user data
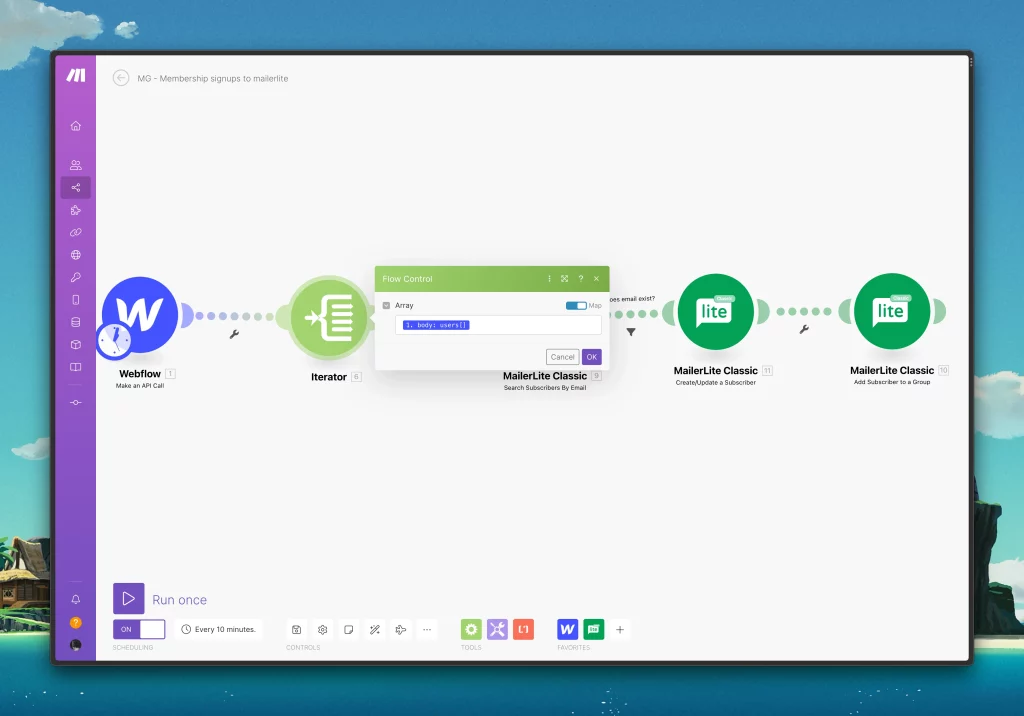
An iterator takes an array (our big list of users) and splits them into separate bundles that make things easier to process.
Add one after the API call module, and select the users array from the first module.
Search for new users in the last 10 minutes
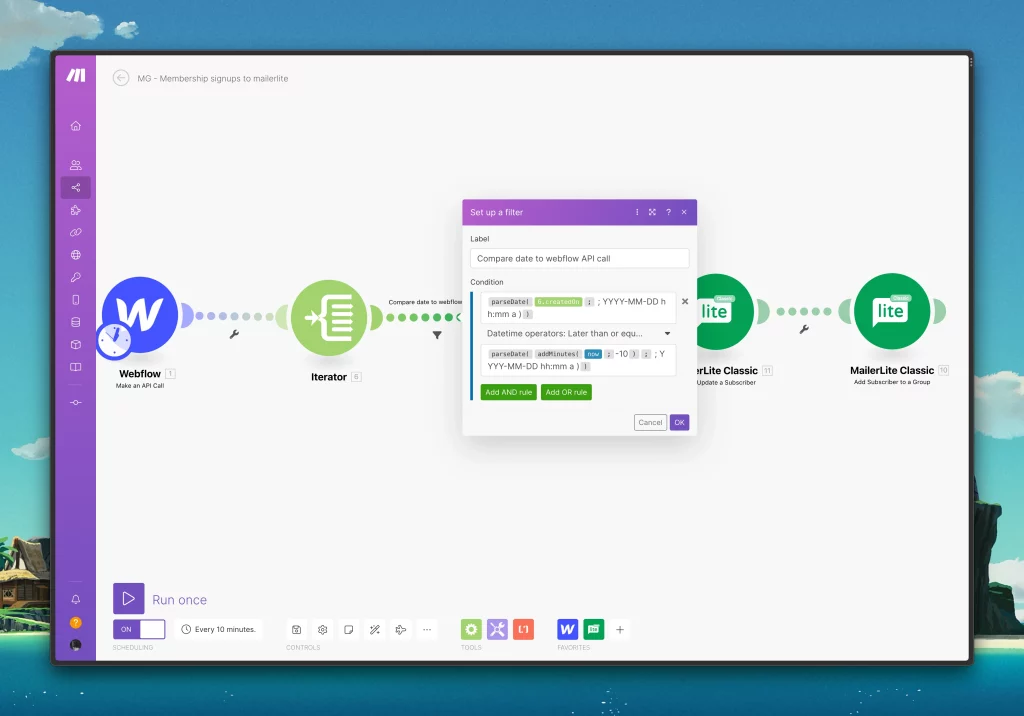
We don’t want to keep fetching 100 users every time we run this automation, so I’ve limited the amount it returns to only people who have signed up in the last 10 minutes.
Huge thanks to my friend Leigh who guided me through this process while he was working on his coffee site.
Set this in your condition field, making sure “createdOn” is selected from the result of the iterator.
{{parseDate(6.createdOn; " ; YYYY-MM-DD hh:mm a )")}}Next, set the Datetime operator to “Earlier than or equal to”, and use the following
{{parseDate(addMinutes(now; -10); " ; YYYY-MM-DD hh:mm a )")}}Search CRM for user
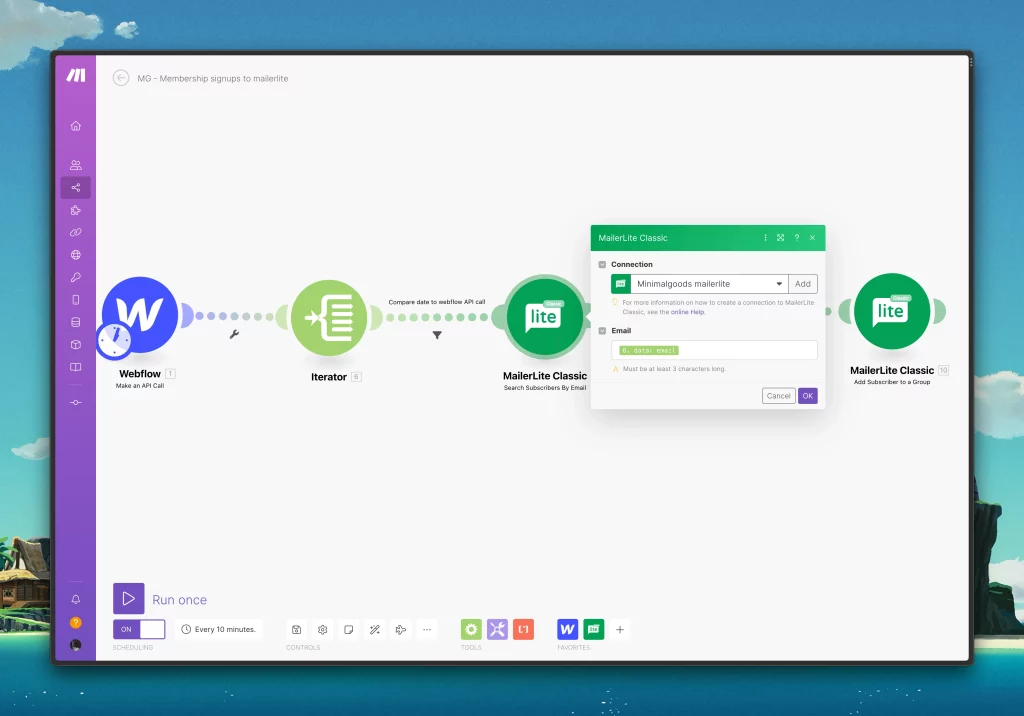
Now we take all of those new emails that have signed up in the last 10 minutes and pass them through to the “Search subscribers by email” module in Mailerlite.
Filter out existing users
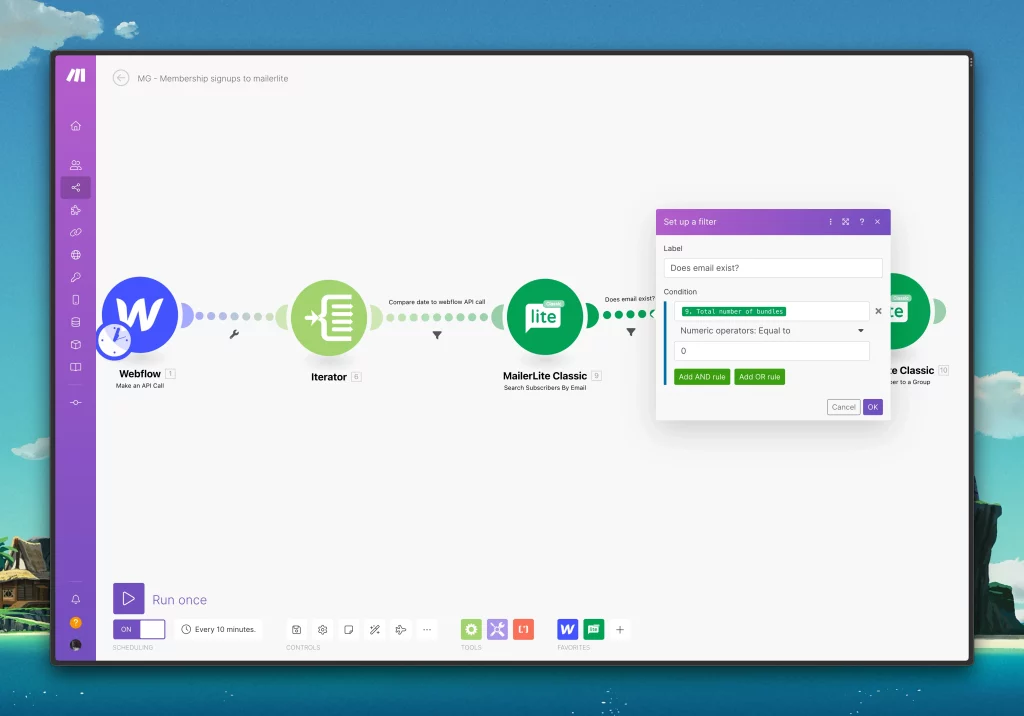
We don’t want to keep adding users if they are already in the system, so we prevent that by adding a simple filter after the previous step.
Here, we’re just looking through the “Total number of bundles” and making sure they are equal to 0 (1 would mean they exist already).
Create a new user in the CRM
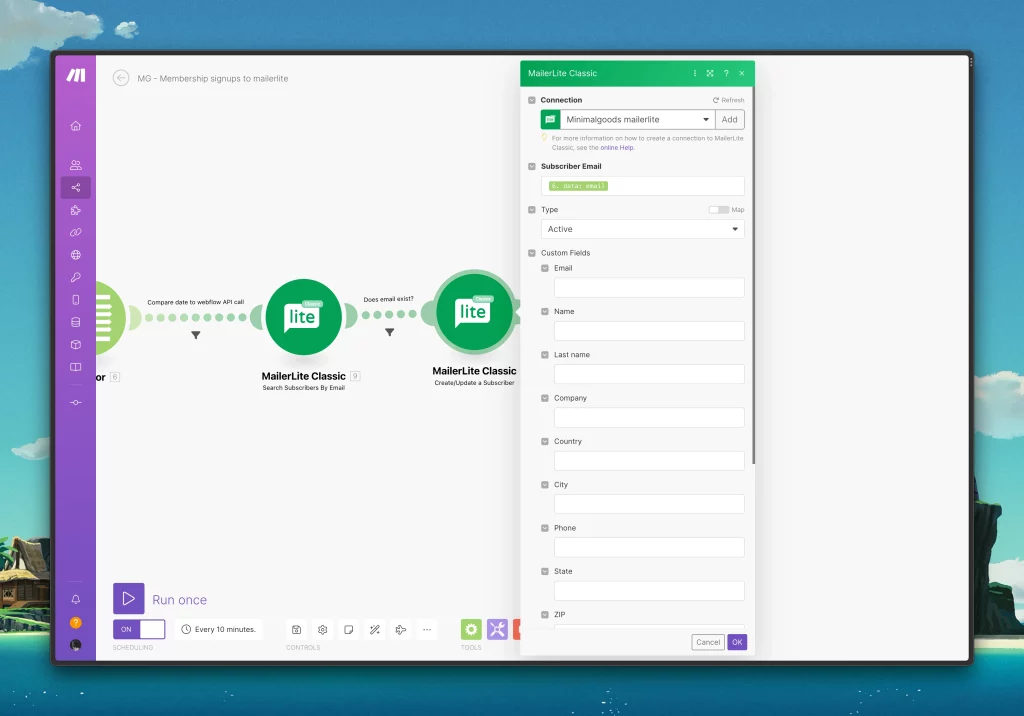
With the “create a subscriber module” added, we can then pass in the email from the iterator.
Add the user to a new group (optional)
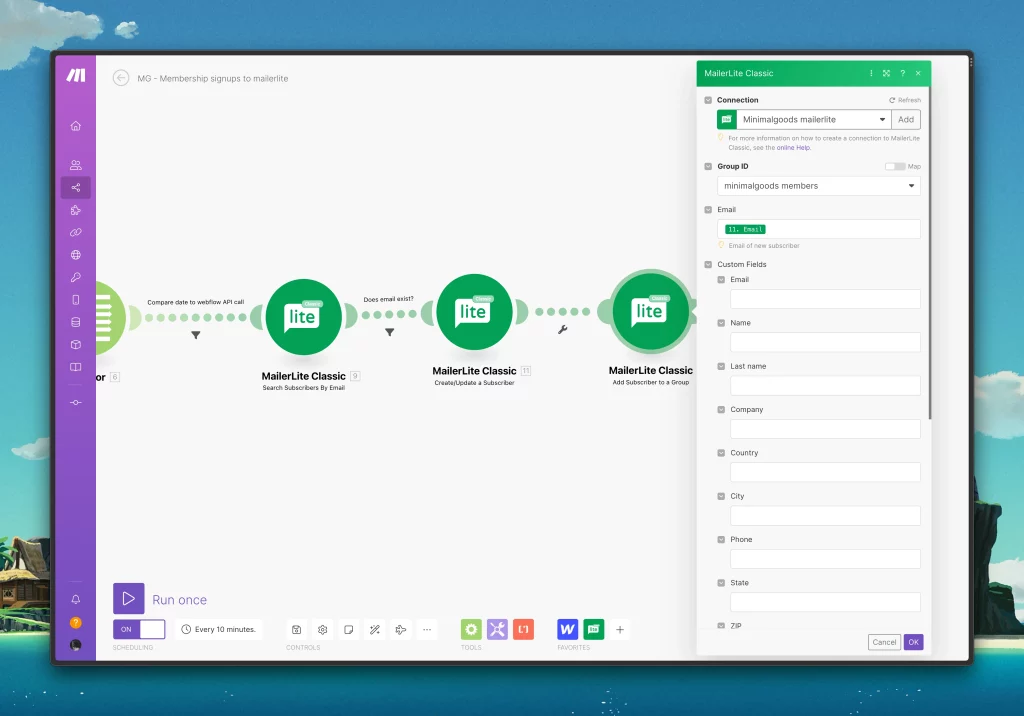
This will come down to how you want your users structured in your CMS, but in my case, I wanted to keep the membership users separate from my typical newsletter users.
To do that, I’ve created a new group in Mailerlite, then I’m assigning all the users in this flow to that group.
Rejoice!
Lastly, don’t forget to run a few tests to make sure things are working as intended. If all goes well, this automation should run every 10 minutes, grab the new users, and then add them to a group in your CRM where you can set up welcome emails, or do whatever else you need.
Let me know if you have any questions in the comments, and I’ll see if I can help.
Thoughts? Feel free to drop a comment or contact me directly.
